


한동안 유니티가 버벅거려서 작업보다는 밀어둔 빨래라든지 청소라든지 노트북 구매라든지 리눅스 설치라든지 이런 거 하며 보냈다. 이것저것 해보다가 OS를 새 버전을 깔았는데 OpenGL 쪽이 버전업이 되었는지 버벅거리는 문제가 해결이 됐다. 다시 작업을 해야겠다. 쉬는 동안 스택과 큐에 대해서 공부를 했다. 당분간은 일부로라도 해당 자료구조를 쓰는 작업을 해서 완전히 내 것으로 만들어야 할 듯싶다. 아마 인벤토리나 대화창 같은 거 아님 능력치 같은걸 만들어야 할 듯싶다. 온전한 전투 시스템을 만드는 건 일단 미루자.
일단은 대화 시스템을 만들어 봐야 겠다. 유튜브로 학습은 하긴 했는 데 따라한 수준이고 아직 내 것으로 만들지는 못했다. 이걸 JSON을 이용해서 외부에서 대화를 편집할 수 있도록 할 생각이다. 그래야 나중에 번역이라던지 이런 작업을 할 때 수월할 테니 말이다. 아 그리고 그 뭐 나중에 데이터 타입을 만들 때도 JSON으로 만들어야 편집이 쉬운 걸로 알고 있다. 이게 SRPG 스튜디오처럼 편집할 수 있는 게 아니니 말이다. 이번 작품을 만든 다음에 게임을 만들 수 있는 엔진 비슷한 걸 만들어 보는 것도 나쁘지 않은 생각인 듯싶다. 차기작으로 C++을 배워서 고닷엔진을 SRPG 스튜디오로 개조하든지 해서 말이다.

문득 문득 그래픽 퀄을 좀 전반적으로 길티기어처럼 올리고 싶지만 첫 작품은 좀 힘을 빼고 만들어야 될 듯싶다. 차기작부터 디자이너랑 영입해서 만들어야 할 듯싶다. 일단은 코딩이랑 기획적인 측면에 공을 들여야 할 듯싶다.

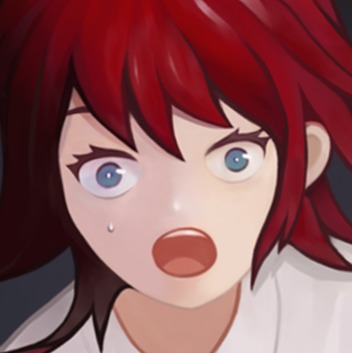
길티기어와 유사한 느낌을 내고 싶었는데 내 마음이 어두었는지 이런 느낌을 유니티가 선사해 줬다.
여튼 그게 중요한게 아니고 대화 시스템을 만들어 보자.
public void AnotherPlayer (int add)
{
if (currentPlayer == null)
{
NextPlayer();
return;
}
for (int i = 0; i < activePlayerList.Count; i++)
{
activePlayerList[i].index = i;
print (activePlayerList [i]. index);
}
int newPlayerIndex = currentPlayer.index + add;
if (newPlayerIndex < 0) newPlayerIndex = activePlayerList.Count -1;
else if (newPlayerIndex > activePlayerList.Count -1) newPlayerIndex = 0;
currentPlayer = activePlayerList [newPlayerIndex];
SelectPlayer (currentPlayer);
}
그전에 엑스컴에서 tap 키를 누르면 넘어가는 기능을 만들고 가야겠다. 이거랑 종료 메뉴도 만들어야 한다.
void Update()
{
if (somthingOn) return;
if (currentPlayer == null) return;
if (Input.GetMouseButtonDown (1) || Input.GetButtonDown ("Cancel"))
{
if (currentPlayer.userState == UserState.Base)
{
currentPlayer.activeOff.Invoke();
currentPlayer.userState = UserState.Non;
currentPlayer.turnState = TurnState.Waiting;
currentPlayer = null;
board.ResetBoard();
board.line.positionCount = 0;
round.position = Vector3.zero;
}
else if (currentPlayer.userState == UserState.CloseCombat)
{
ResetClose();
currentPlayer.userState = UserState.Base;
}
}
if (currentPlayer == null) return;
if (currentPlayer.activeState == ActiveState.NotAnything) return;
if (Input.GetKeyDown (KeyCode.Tab))
{
AnotherPlayer (1);
}
}
종료 메뉴는 천천히 만들도록 하자. 일단 대화 시스템부터 만들자. 공부한다고 생각하고 천천히 만들어 봐야겠다.

자연스럽게 대화창이 숨겨져 있다가 이동하는 애니메이션을 구현해야 할 듯싶다. 애니메이션이나 트윈같은 걸로 만들면 되려나. 일단 그건 뒤로 미루고 대화 시스템 부터 만들어 보자. 아 그리고 대화를 할때 다른 조작을 막아야 할듯 싶다.

대화창을 고려했을 때 플레이어 기술 슬롯을 제한해야 할지도 모른다는 생각이 든다. 8개나 6개로 제한해야 할 듯싶다. 드론의 경우에는 4개로 제한을 하고 말이다. 드론의 경우에는 플레이어보다 적은 수로 제한하고 말이다.

너무 기술 숫자가 많아지면 쿨다운이 의미가 없어지니 말이다. 본격적으로 시스템을 만들어야 하는데 작업할 엄두가 안 난다. 왜 그런지 잘 모르겠다. 흔히 말하는 슬럼프가 온 건지 싶다.
아마도 그동안 일하는 거에 비해 생각보다 진도가 팍팍 안 나가서 그런 듯싶다. 그래서 약간 자포자기 심정으로 일을 할 염두가 안나는 거인 듯싶기도 하다. 아니면 실력이 부족해서 그런지도 모르겠다. 해결 방법이 먼지 모르겠는데 자꾸 그만두라고 했던 사람들의 연락이 폰에 찍힌 거 보니 정신이 아득하다. 일단 다시 열정이 올 때까지 무기한 대기를 해야겠다. 지금 사람 만나면 그만두라는 말에 넘어갈 듯싶으니 말이다.
혼자 술을 마시고 악몽을 내리 3개를 연속으로 꾸고 일어났다. 그런데 문득 갑자기 if for var function 밖에 몰랐지만 엄청 비효율적인 코드를 짜면서도 밥 먹는 것도 있은 채로 엄청 재미있었던 그때가 생각 났다. 그후로 많은 걸 배웠는데 이렇게 해야 한다 저렀게 해야 한다 이런걸 너무 많이 배우고 기능들을 배우다 보니 나도 모르게 시작하는데 두려움이 생긴게 아닐까. 아무렇게 해도 상관 없는데 말이다. 나중에 천천히 고치면 되는데.
다시 엄청 비효율 적인 코드를 짜도 아무렇지도 않고 오히려 재미 있었던 그때의 마음 가짐으로 다시 돌아가서 천천히 시작해야겠다. 그 후로 새로운 걸 배울 때 에디터가 제공하는 걸 하나하나 직접 테스트를 하면서 배웠던 기억이 난다. 그걸 다시 해보자. 일단 배워야 할게 스택과 큐다. 대화를 만들어야 하는 큰 목표는 일단 잊고 일단 작은 것부터 시작해 보자. 영상부터 보고 오자.
오케이 일단 Push와 Pop... Enqueue와 Dequeue라는 함수가 어떤 일을 하는지 확인하는 것부터 해보자. 이건 쉬우니까 할 수 있겠지.
using System.Collections;
using System.Collections.Generic;
using UnityEngine;
public class Test : MonoBehaviour {
// Use this for initialization
void Start () {
}
// Update is called once per frame
void Update () {
}
}
여기서 using System.Collections.Generic; 이게 있어야지 스택과 큐라는 새로운 기능을 쓸 수가 있다고 한다.
using System.Collections;
using System.Collections.Generic;
using UnityEngine;
public class Test : MonoBehaviour {
Stack <int> myStack = new Stack <int>();
Queue <int> myQueue = new Queue <int>();
// Use this for initialization
void Start () {
}
// Update is called once per frame
void Update () {
}
일단 큐와 스택의 스펠링부터 외우자. 작은 것부터 차근차근 간다. stack이고 queue다 stack은 밭침이 ck고 queue는 ue가 두 번 반복이 된다. 완전 초보라는 마음 가짐으로 접근한다. 어렵지 않다.
스택은 쌓아두다는 뜻이고 큐는 순서대로 찍어나가는 컨베이어 벨트 같은 느낌이 든다. 찾아보니 나중에 넣은걸 꺼내고 큐는 처음에 넣어놓은걸 꺼낸다고 한다. 넣는 게 push와 engueue고 빼는 게 pop과 dequeue인 듯싶다. 가설이 맞는지 확인을 해보자.
void Start () {
myStack.Push (1);
myStack.Push (2);
myStack.Push (3);
print (myStack.Peek());
print (myStack.Pop());
print (myStack.Pop());
}
332 이런 식으로 나오는 거 보니 Peek는 제거를 하지 않고 꺼내는 거고 Pop은 제거를 하고 꺼내는 것으로 생각된다. 역시나 중에 넣은 것이 튀어나온다. 이번엔 큐를 시도해보자.
Stack <int> myStack = new Stack <int>();
Queue <int> myQueue = new Queue <int>();
// Use this for initialization
void Start () {
myStack.Push (1);
myStack.Push (2);
myStack.Push (3);
print (myStack.Peek());
print (myStack.Pop());
print (myStack.Pop());
myQueue.Enqueue (1);
myQueue.Enqueue (2);
myQueue.Enqueue (3);
print (myQueue.Peek());
print (myQueue.Dequeue());
print (myQueue.Dequeue());
}
// Update is called once per frame
void Update () {
}
이번엔 112 이렇게 나온다. 어떻게 하는지 감을 잡은 듯싶다. 이제 대화 시스템을 만들어 보자. 이 기능은 유튜브에 있으니 그걸 따라 하면서 배우도록 하자. 나중에 JSON 버전으로 바꾸는 것만 추가하면 될 듯싶다.
영상을 보고 머가 먼지 모르고 한번 따라 해 봤으니 이번에는 하나하나 차근차근 따라 해 봐야겠다.
public Queue <string> sentences;
일단 문장이 들어갈 큐를 만든다. 큐를 쓰는 이유는 문장이 입력된 순서대로 나와야 하기 때문인 듯싶다.
using System.Collections;
using System.Collections;
using System.Collections.Generic;
using UnityEngine;
public class DialoqueManager : MonoBehaviour {
Queue <string> sentences;
void Start () {
sentences = new Queue <string>();
}
}
초기화를 해준다. 천천히 하나하나 보면서 가자. 두려워서 머뭇거리지 않도록 말이다.
using System.Collections;
using System.Collections.Generic;
using UnityEngine;
public class Dialogue {
public string [] sentences;
}
아마 여기서 sentences를 JSON으로 바꾸어 주는 걸로 구현하면 될 듯싶다.
using System.Collections;
using System.Collections.Generic;
using UnityEngine;
[System.Serializable]
public class Dialogue {
public string [] sentences;
}
지금은 유니티 창에서 편집을 해 주어야 하기 때문에 [System.Serializable]를 활용한다.
using System.Collections;
using System.Collections.Generic;
using UnityEngine;
public class DialoueTrigger : MonoBehaviour {
}

테스트에 사용할 다이얼로그 트리거를 만들어 준다.
using System.Collections;
using System.Collections.Generic;
using UnityEngine;
[System.Serializable]
public class Dialogue {
[TextArea (3, 10)]
public string [] sentences;
}
텍스트 에어리어라는 새로운 기능을 배웠다.
using System.Collections;
using System.Collections.Generic;
using UnityEngine;
public class DialoqueManager : MonoBehaviour {
Queue <string> sentences;
void Start ()
{
sentences = new Queue <string>();
}
public void StartDialoque (Dialogue Dialogue)
{
}
}
using System.Collections;
using System.Collections.Generic;
using UnityEngine;
public class DialoueTrigger : MonoBehaviour {
public Dialogue dialogue;
DialoqueManager dialoqueManager;
void Awake()
{
dialoqueManager = FindObjectOfType <DialoqueManager>();
}
public void TriggerDialogue()
{
dialoqueManager.StartDialoque (dialogue);
}
}
기본 세팅을 해준다.
using System.Collections;
using System.Collections.Generic;
using UnityEngine;
public class DialoqueManager : MonoBehaviour {
Queue <string> sentences;
void Start ()
{
sentences = new Queue <string>();
}
public void StartDialoque (Dialogue dialogue)
{
print ("Start Dialoque");
}
}
슬슬 중간 테스트를 할 때가 된 듯싶다. 오타가 있어서 수정하느라 시간이 좀 지체됐다.
using System.Collections;
using System.Collections.Generic;
using UnityEngine;
public class DialoqueManager : MonoBehaviour {
Queue <string> sentences;
void Start ()
{
sentences = new Queue <string>();
}
public void StartDialoque (Dialogue dialogue)
{
print ("Start Dialoque");
sentences.Clear();
}
}
우선 초기화를 한번 해준다.
using System.Collections;
using System.Collections.Generic;
using UnityEngine;
public class DialoqueManager : MonoBehaviour {
Queue <string> sentences;
void Start ()
{
sentences = new Queue <string>();
}
public void StartDialoque (Dialogue dialogue)
{
print ("Start Dialoque");
sentences.Clear();
foreach (var sentence in dialogue.sentences)
{
sentences.Enqueue (sentence);
}
}
}
다이얼로그 매니저에 대사를 불러와서 넣어준다.
using System.Collections;
using System.Collections.Generic;
using UnityEngine;
public class DialoqueManager : MonoBehaviour {
Queue <string> sentences;
void Start ()
{
sentences = new Queue <string>();
}
public void StartDialoque (Dialogue dialogue)
{
print ("Start Dialoque");
sentences.Clear();
foreach (var sentence in dialogue.sentences)
{
sentences.Enqueue (sentence);
}
DisplayNextSentence();
}
public void DisplayNextSentence()
{
if (sentences.Count == 0)
{
EndDialoque();
return;
}
}
void EndDialoque()
{
}
}
끝났을 때 기능을 만들어 준다.
public void DisplayNextSentence()
{
if (sentences.Count == 0)
{
EndDialoque();
return;
}
string sentence = sentences.Dequeue();
print (sentence);
}
로그를 찍어서 잘되는지 확인을 해준다.
using System.Collections;
using System.Collections.Generic;
using UnityEngine;
using UnityEngine.UI;
public class DialoqueManager : MonoBehaviour {
public Text dialogueText;
UI를 사용할 수 있도록 해준다.

애니메이션 넣는 거는 일단 건너뛰고 텍스쳐가 하나씩 나오는 걸 구현해야 할 듯싶다. 이게 나이가 먹어서 먼가 새로운 걸 배우고 따라 하는걸 두려워하는 것일 수도 있으니 당분간은 그동안 배울걸 제대로 소화하는 쪽으로 가는 시도를 해봐야겠다.
public void DisplayNextSentence()
{
if (sentences.Count == 0)
{
EndDialoque();
return;
}
string sentence = sentences.Dequeue();
StopAllCoroutines();
StartCoroutine (TypeSentence (sentence));
}
IEnumerator TypeSentence (string sentence)
{
dialogueText.text = "";
foreach (var letter in sentence.ToCharArray())
{
dialogueText.text += letter;
yield return null;
}
}
메시지가 줄줄이 나오는 걸 만들었다. 영상은 다 본 듯싶고 이제 다음으로 할 건 이걸 JSON으로 만드는 거다. 그래야 나중에 번역 작업 같은 거 맡기는 게 수월하니까 말이다.
public void TriggerDialogue()
{
dialoqueManager.StartDialoque (dialogue);
dialoqueManager.dialogueBox.gameObject.SetActive (true);
}
Text dialogueText;
public Transform dialogueBox;
Queue <string> sentences;
void Awake()
{
dialogueText = dialogueBox.Find ("Text"). GetComponent <Text>();
}
void EndDialoque()
{
dialogueText.text = "";
dialogueBox.gameObject.SetActive (false);
}
하나하나 적어 가면서 하니까 해결이 쉬운 듯싶다. 트리거가 발동되면 박스가 나타났다가 끝나면 사라지도록 하는 걸 만든다.
json의 경우에는 이 영상을 보면 되는 듯싶다. StreamingAssets 이란 폴더에 넣으면 될 듯싶다. 진짜로 그렇게 되는지는 직접 확인해 봐야겠다.
...
빌드가 더럽게 느리다. 돈 벌면 좋은 컴퓨터부터 사야 겠다. 잘 된다. 리소스랑 코드랑 오픈해 놓을 생각이다. 편집해서 모드를 자유롭게 만들어라고 말이다. 물론 그러려면 알기 쉽게 정리를 한번 쭉 할 필요가 있다. 일단 그게 급한 게 아니니 JSON 기능부터 익히자.
먼가 문제 인지 모르겠는데 빌드해 놓으니 버벅거린다. 스트리밍 에셋이라서 그런 듯싶다. 오픈은 대사만 해야겠다.

너무 아래에 있어서 안 보여서 위로 올렸다. 아마 이건 차차 좋은 위치를 찾아가야 할 듯싶다.
먼가 가시적으로 보이는 게 있으니까 계속 작업을 하고 싶어지는듯싶다. 이게 UI같은거 부터 만들고 내부 시스템은 천천히 만드는 걸로 가야지 작업 기피 현상을 피할수 있는 듯 싶다. 가시적인 성과나 진전이 없는데도 계속하는 건 진이 빠지는 일이니 말이다.

Json Editor다 이게 있으니 아마 풀머가 아닌 사람 가령 번역가도 쉽게 수정할 수 있을 듯싶다.
온라인 버전은 여기에 있다.
https://e2xist.tistory.com/666
VS Code 단축키 일람이다. Ctrl+Shift+P 를 통해 명령 커맨드를 열 수 있다.
다이얼로그 클래스가 아니라 Json으로 불러와서 만들어 봐야겠다.
using System.Collections;
using System.Collections.Generic;
using UnityEngine;
using System.IO;
public class DialoueTrigger : MonoBehaviour {
public string path;
public string [] sentences;
DialoqueManager dialoqueManager;
void Awake()
{
dialoqueManager = FindObjectOfType <DialoqueManager>();
}
public void TriggerDialogue()
{
path = Application.streamingAssetsPath + "/Dialoque.json";
sentences = File.ReadAllLines (path);
dialoqueManager.StartDialoque (sentences);
dialoqueManager.dialogueBox.gameObject.SetActive (true);
}
}
public void StartDialoque (string [] dialogue)
{
// print ("Start Dialoque");
sentences.Clear();
foreach (var sentence in dialogue)
{
sentences.Enqueue (sentence);
}
DisplayNextSentence();
}
이렇게 바꿔봤는데 먼가 제대로 안 뜬다.
{
"hellow": ["Hellow", "World"],
"hi": ["Hi", "World"]
}
jsopn을 이런 배열 형식으로 바꾸어 본다.
{
"sentences": [
"Hellow",
"World"
]
}
다시 이런 식으로 바꿔 봤다. 중간에 유니티가 터져서 다시 작업을 해야 하는 판국이다. 물론 꼼꼼하게 기록을 해놓으니 이전 버전을 복구해서 다시 작업하는 건 무리가 없긴 하다. 밥이나 먹고 와야겠다. 이렇게 터질 때를 대비해서 코드를 정리를 해야겠다.
일단 포스트는 여기서 마무리하고 Json에 경우에는 새로 포스트를 파서 다시 도전해야겠다.
'턴제제작' 카테고리의 다른 글
| 리펙토링 (0) | 2019.04.20 |
|---|---|
| 적 근접전투 (0) | 2019.04.11 |
| 다음에 할일 (7) | 2019.03.16 |
| 근접 전투 [영상] (0) | 2019.03.16 |
| 근접 공격 (0) | 2019.03.09 |
WRITTEN BY